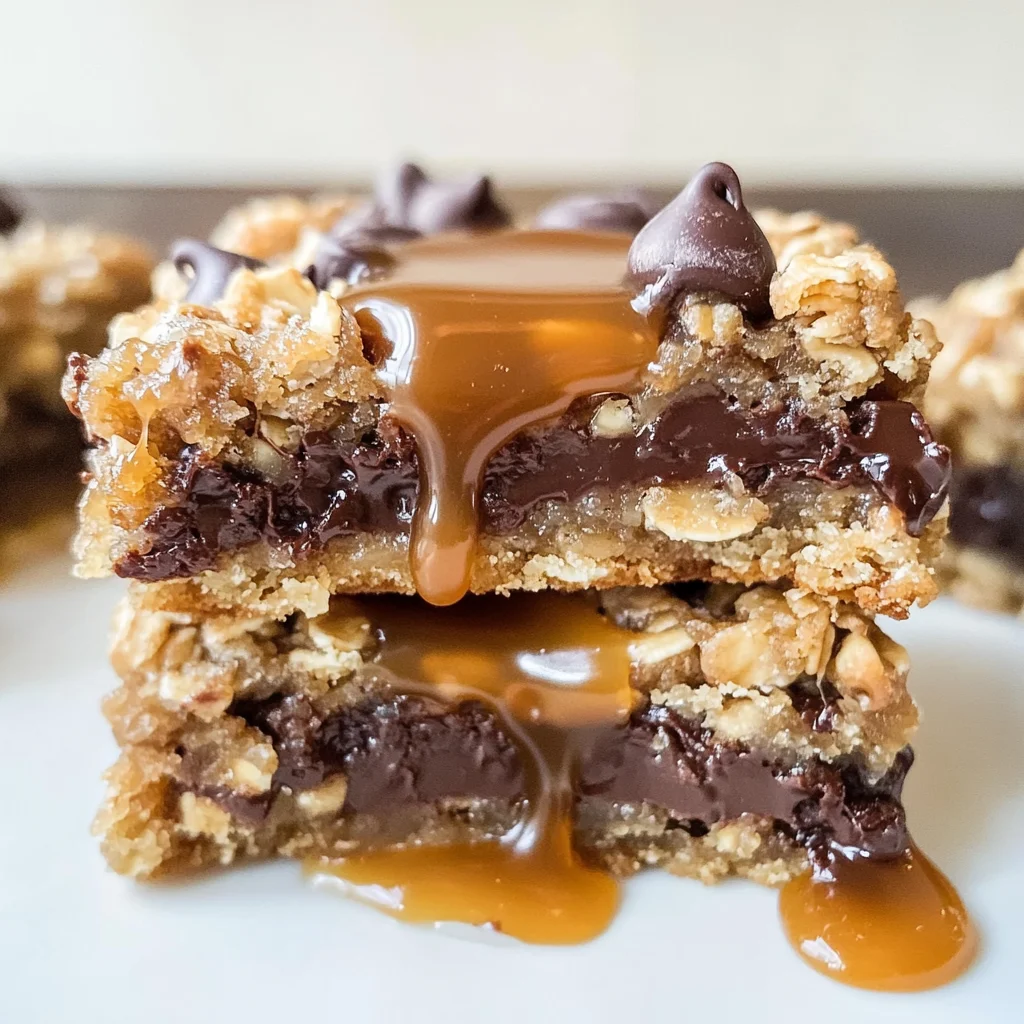
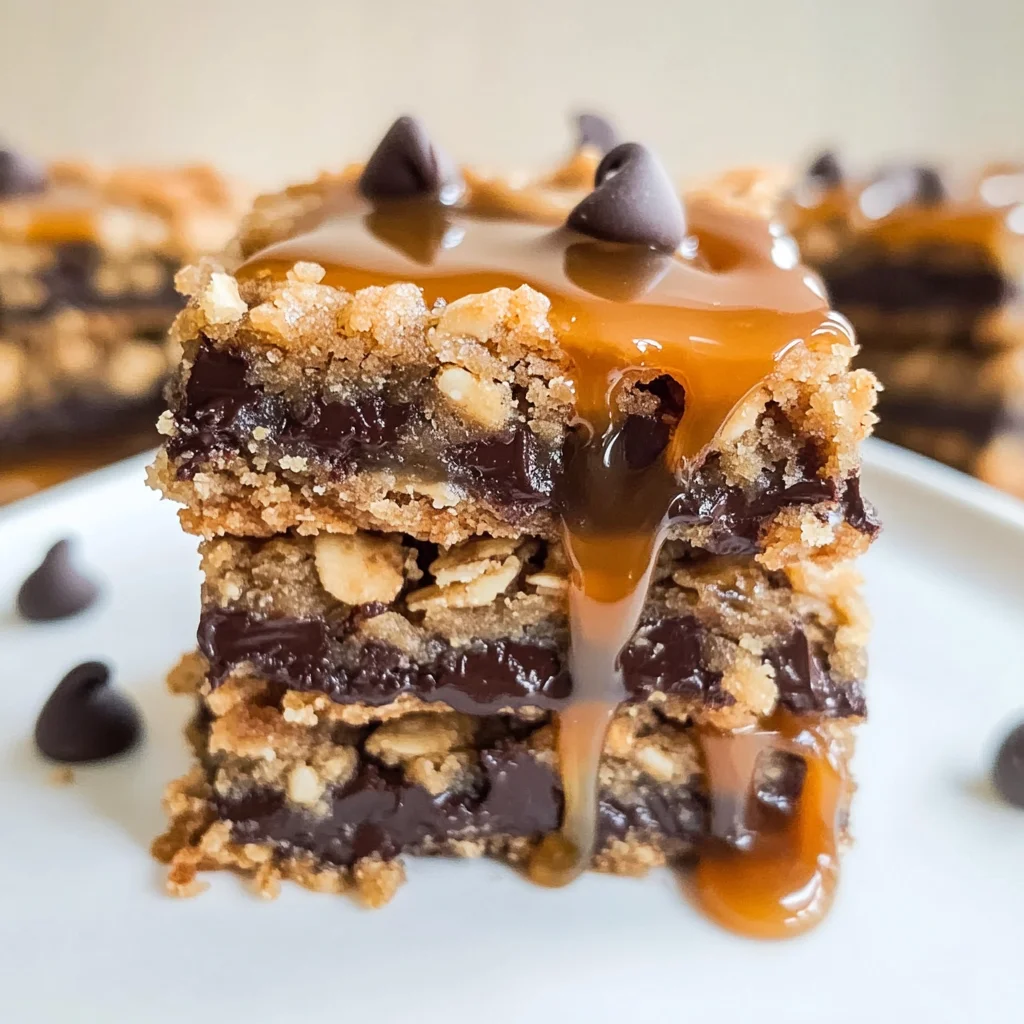
🎉🧡😋 For the serious caramel lover, these soft and chewy bars are dripping with caramel and stuffed with chocolate! Easy one-bowl, no-mixer recipe! Carmelitas are perfect for any occasion, from casual family gatherings to festive celebrations. They combine the rich flavors of caramel and chocolate, making them an irresistible treat that everyone will enjoy.
Why You’ll Love This Recipe
- Easy to Make: With just one bowl required, preparation is a breeze, allowing you more time to enjoy your delicious creation.
- Decadent Flavor: The combination of caramel, chocolate, and oats offers a delightful blend of sweetness and texture in every bite.
- Perfect for Sharing: These bars are cut into generous squares, making them an excellent choice for parties or potlucks where sharing is key.
- Versatile Treat: Enjoy them as a dessert, snack, or even a sweet pick-me-up during your day. They are great anytime!
- Make Ahead Convenience: These bars can be prepared ahead of time and stored for later enjoyment, making them great for busy schedules.
Tools and Preparation
To make these scrumptious Carmelitas, you’ll need a few essential tools that will simplify your cooking process.
Essential Tools and Equipment
- 8×8-inch baking pan
- Aluminum foil
- Cooking spray
- Microwave-safe mixing bowl
- Whisk or spoon
- Spatula
Importance of Each Tool
- Baking Pan: An 8×8-inch pan provides the perfect size for even baking and easy slicing after cooling.
- Aluminum Foil: Lining your pan with aluminum foil ensures easy cleanup and prevents the sticky caramel from sticking to the pan.
- Microwave-Safe Mixing Bowl: Using a microwave-safe bowl allows you to melt butter and caramels efficiently without any hassle.
Ingredients
For the Base
- 3/4 cup butter (melted; I use unsalted butter but salted may be used)
- 3/4 cup light brown sugar (packed)
- 1 tablespoon vanilla extract
- 1 cup all-purpose flour
- 1 cup whole-rolled old fashioned oats (not instant or quick cook)
- 1 teaspoon baking soda
- 1/2 teaspoon salt (or to taste)
For the Filling
- 35 caramel squares
- 1/2 cup heavy cream
- 1 cup semi-sweet chocolate chips or chunks (I used a combo)
How to Make Carmelitas
Step 1: Preheat the Oven
Preheat your oven to 350°F. Line an 8×8-inch pan with aluminum foil and spray it with cooking spray. Lining your pan is highly recommended for ease of cleanup due to the stickiness of the caramel; set the pan aside.
Step 2: Prepare the Base Mixture
In a large microwave-safe mixing bowl:
1. Add the melted butter.
2. Heat on high power until melted, about 90 seconds.
3. Add brown sugar and vanilla extract; whisk until smooth.
4. Stir in flour, oats, baking soda, and salt until well combined. The mixture will be quite thick.
Step 3: Bake the Base Layer
- Take half of the mixture (eyeball it) and spread it evenly into the prepared pan using a spatula or back of a spoon.
- Bake in preheated oven for 10 minutes while you prepare the caramel sauce.
Step 4: Make Caramel Sauce
In another large microwave-safe mixing bowl:
1. Combine caramel squares, heavy cream, and salt.
2. Heat in high power in 60-second bursts for about 4 to 5 minutes total until melted. Stir after each burst until smooth.
Step 5: Assemble Carmelitas
- Remove baked base from oven; sprinkle evenly with chocolate chips.
- Slowly pour warm caramel sauce over chocolate layer.
- Crumble reserved oatmeal-brown sugar mixture evenly on top.
Step 6: Final Bake
Return pan to oven:
1. Bake for about 15 to 18 minutes until edges are lightly browned and center is bubbling slightly.
2. Allow bars to cool completely in the pan before slicing—this can take up to 4 hours at room temperature or overnight.
Now you have delicious homemade Carmelitas ready to impress! Enjoy every chewy bite!
How to Serve Carmelitas
Carmelitas are a delightful treat that can be enjoyed in various ways. These chewy bars are perfect for sharing or enjoying as an indulgent dessert after dinner.
With Ice Cream
- Vanilla Ice Cream – A classic pairing, the creaminess of vanilla ice cream complements the rich caramel and chocolate.
- Salted Caramel Ice Cream – For an extra kick, try serving with salted caramel ice cream to enhance the flavors of your Carmelitas.
As a Snack
- Afternoon Treat – Enjoy a warm slice with a cup of tea or coffee for a comforting afternoon snack.
- Lunchbox Surprise – Pack a piece in your child’s lunchbox; it’s a sweet surprise they’ll love.
For Special Occasions
- Party Platter – Slice into smaller squares and arrange on a platter for parties; they make great finger food.
- Dessert Table Highlight – Include Carmelitas on your dessert table during celebrations; they add a touch of homemade goodness.
How to Perfect Carmelitas
To make your Carmelitas even more delicious, consider these handy tips. They will help you achieve that perfect texture and flavor everyone loves.
- Use Fresh Ingredients – Always use fresh oats and high-quality chocolate chips for the best flavor.
- Don’t Rush Cooling – Allow the bars to cool completely before cutting. This ensures clean slices and better texture.
- Adjust Sweetness – If you prefer less sweetness, reduce the brown sugar slightly in the mixture without sacrificing consistency.
- Experiment with Mix-ins – Feel free to add nuts or dried fruit for added texture and flavor variation.
Best Side Dishes for Carmelitas
Carmelitas can be paired with several side dishes that complement their rich flavors. Here are some great options to consider:
- Fresh Fruit Salad – A refreshing mix of seasonal fruits balances the sweetness of Carmelitas perfectly.
- Chocolate-Covered Strawberries – The tartness of strawberries dipped in chocolate pairs well with caramel flavors.
- Whipped Coconut Cream – Light and airy, coconut cream adds a tropical twist that complements the caramel nicely.
- Coffee or Espresso – A strong cup of coffee enhances the chocolate notes in Carmelitas while providing a nice contrast.
- Nutty Granola – Serve alongside crunchy granola for added texture; it also makes for a balanced snack option.
- Cheese Platter – A selection of mild cheeses can provide an interesting savory contrast to the sweet bars.
Common Mistakes to Avoid
To ensure your Carmelitas turn out perfectly every time, here are some common mistakes to watch for.
-
Skipping the pan lining – Failing to line your baking pan can make it extremely difficult to remove the bars once baked. Always use aluminum foil and cooking spray for easy removal.
-
Not measuring ingredients accurately – Using too much or too little of any ingredient may alter the texture and flavor. Use proper measuring cups and spoons to ensure precision.
-
Overmixing the batter – Overmixing can lead to tough bars instead of soft and chewy ones. Mix just until combined for the best texture.
-
Rushing the cooling process – Cutting into the bars before they have cooled completely can result in a gooey mess. Allow them to cool for several hours or overnight for clean cuts.
-
Ignoring ingredient temperature – Using cold butter or cream can affect how well the mixture combines. Ensure all ingredients are at room temperature for optimal results.
Storage & Reheating Instructions
Refrigerator Storage
- Store Carmelitas in an airtight container.
- They will last up to one week in the refrigerator.
- Place parchment paper between layers if stacking to prevent sticking.
Freezing Carmelitas
- Wrap individual bars tightly in plastic wrap.
- Store in a freezer-safe container or bag.
- They can be frozen for up to three months.
Reheating Carmelitas
- Oven – Preheat to 350°F (175°C), place bars on a baking sheet, and warm for about 10 minutes.
- Microwave – Heat individual bars on a microwave-safe plate for about 10-15 seconds.
- Stovetop – Place a bar in a skillet over low heat, cover with a lid, and warm gently until soft.
Frequently Asked Questions
Here are some frequently asked questions about making Carmelitas that might help you further:
Can I use different types of chocolate chips in my Carmelitas?
Yes! You can substitute semi-sweet chocolate chips with milk chocolate, dark chocolate, or even white chocolate based on your preference.
How do I know when my Carmelitas are done baking?
Carmelitas are done when the edges are lightly browned and the center is bubbling slightly. Keep an eye on them towards the end of baking to avoid overcooking.
What can I substitute for heavy cream in this recipe?
You can replace heavy cream with coconut cream or a dairy-free alternative if you’d like a lighter option without sacrificing creaminess.
How should I store leftover Carmelitas?
Store leftover Carmelitas in an airtight container at room temperature for about one week, or refrigerate them for longer freshness.
Can I add nuts or other toppings to my Carmelitas?
Absolutely! Feel free to add chopped nuts like pecans or walnuts, or even dried fruits like cranberries for extra flavor and texture.
Final Thoughts
These Carmelitas are not only delicious but also incredibly versatile. With their rich caramel flavor and chewy texture, they make a perfect dessert for any occasion. Feel free to customize your bars with different types of chocolate or add-in ingredients like nuts or dried fruit. We hope you give this easy recipe a try!
Carmelitas
Indulge in the delightful world of Carmelitas, where every bite is a harmonious blend of rich caramel and chocolate nestled in a chewy oat base. These easy-to-make dessert bars are perfect for any occasion—from casual family gatherings to festive celebrations. Featuring a simple one-bowl recipe that requires no mixer, you can whip up these treats with minimal effort. The irresistible combination of flavors and textures makes Carmelitas a favorite for sharing, snacking, or as an indulgent dessert after dinner. Prepare them ahead of time for convenience, and enjoy the satisfaction of homemade goodness.
- Prep Time: 15 minutes
- Cook Time: 28 minutes
- Total Time: 43 minutes
- Yield: Approximately 16 servings 1x
- Category: Dessert
- Method: Baking
- Cuisine: American
Ingredients
- 3/4 cup melted butter
- 3/4 cup light brown sugar
- 1 tablespoon vanilla extract
- 1 cup all-purpose flour
- 1 cup whole-rolled oats
- 1 teaspoon baking soda
- 1/2 teaspoon salt
- 35 caramel squares
- 1/2 cup heavy cream
- 1 cup semi-sweet chocolate chips
Instructions
- Preheat your oven to 350°F (175°C). Line an 8×8-inch baking pan with aluminum foil and spray with cooking spray.
- In a microwave-safe bowl, melt the butter. Stir in brown sugar and vanilla until smooth. Add flour, oats, baking soda, and salt; mix until combined.
- Spread half of the mixture into the prepared pan and bake for 10 minutes.
- In another bowl, combine caramel squares and heavy cream; heat until melted and smooth.
- Remove baked base from the oven, sprinkle with chocolate chips, then pour warm caramel over it. Crumble remaining oat mixture on top.
- Bake for an additional 15-18 minutes until edges are browned and center is bubbling slightly. Let cool completely before slicing.
Nutrition
- Serving Size: 1 bar (approximately 50g)
- Calories: 210
- Sugar: 14g
- Sodium: 150mg
- Fat: 10g
- Saturated Fat: 6g
- Unsaturated Fat: 4g
- Trans Fat: 0g
- Carbohydrates: 30g
- Fiber: 1g
- Protein: 2g
- Cholesterol: 20mg

Leave a Comment