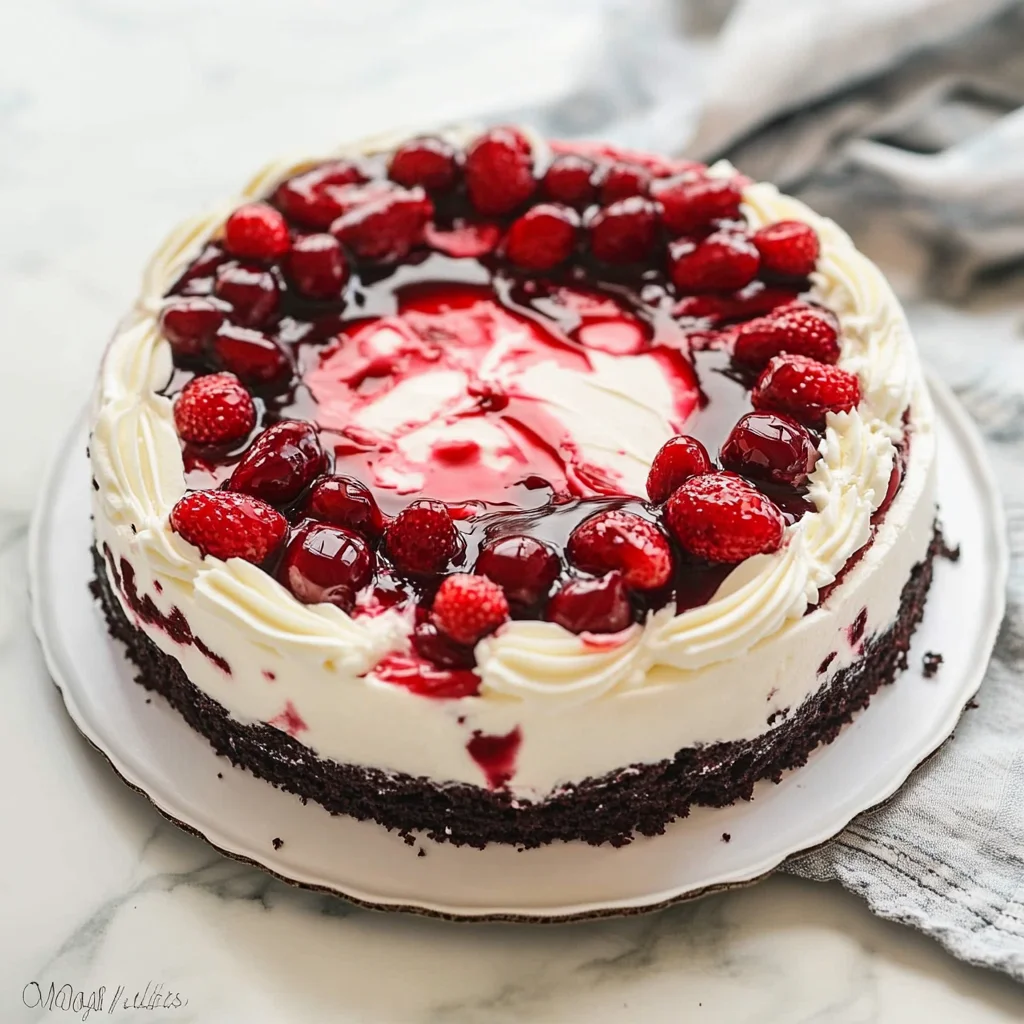
This No Bake Black Forest Icebox Cake is an easy no bake dessert that is perfect for summer! With just four simple ingredients, it’s a delightful treat that will impress at any gathering. Whether you’re hosting a picnic, celebrating a birthday, or simply craving something sweet, this cake offers rich chocolate and cherry flavors that everyone will love. Plus, its chilled nature makes it incredibly refreshing on warm days.
Why You’ll Love This Recipe
- Quick and Easy: With only 15 minutes of prep time, you can whip up this delicious dessert in no time.
- No Baking Required: Perfect for those hot summer days when you want a treat without heating up the kitchen.
- Rich Flavor: The combination of chocolate wafers and cherry pie filling creates a decadent flavor profile that’s hard to resist.
- Customizable: Feel free to add your favorite toppings like chocolate shavings or extra cherries for added flair.
- Perfectly Chilled: This icebox cake tastes even better after sitting in the fridge, allowing all flavors to meld beautifully.
Tools and Preparation
To make this No Bake Black Forest Icebox Cake, you’ll need some essential tools to ensure everything goes smoothly.
Essential Tools and Equipment
- Springform pan
- Mixing bowl
- Electric mixer
- Spatula
Importance of Each Tool
- Springform pan: Allows easy removal of the cake once it’s set, giving you a beautiful presentation.
- Electric mixer: Makes whipping cream effortless and ensures you achieve those stiff peaks quickly.
Ingredients
This No Bake Black Forest Icebox Cake requires just a few ingredients:
- 2 packages chocolate wafer cookies or chocolate graham crackers (about 300g)
- 1 can cherry pie filling (540ml or 2 cups)
- 2 cups heavy whipped cream (or substitute frozen whipped topping, thawed, and omit sugar)
- 1/2 cup powdered icing sugar
For Garnish
- 2 tablespoons fresh parsley, finely chopped
How to Make No Bake Black Forest Icebox Cake
Step 1: Prepare the Whipped Cream
In a large bowl, beat together the heavy whipped cream and powdered sugar on high speed until stiff peaks form. This step is crucial for achieving that light and airy texture.
Step 2: Layer the Cookies
Place one layer of chocolate wafer cookies in a 9-inch Springform pan. Feel free to break them to fit or overlap them slightly. Once the base is set, top with about one-third of the whipped cream mixture followed by one-third of the cherry pie filling.
Step 3: Repeat Layers
Repeat this layering process two more times so you have three layers total. Ensure each layer has an equal distribution of cream and cherries for balanced flavor.
Step 4: Chill Before Serving
Cover the cake with plastic wrap or a lid and refrigerate for at least six hours or overnight if possible. This chilling time allows the flavors to blend perfectly. When ready to serve, garnish with additional whipped cream if desired, slice into pieces, and enjoy your delicious creation!
How to Serve No Bake Black Forest Icebox Cake
Serving No Bake Black Forest Icebox Cake is as delightful as making it. This dessert is versatile and can be enjoyed in many ways. Here are some serving suggestions to elevate your dessert experience.
With Fresh Cherries
- Serve with fresh cherries on top for a burst of flavor and color.
- They add a delightful crunch and enhance the cake’s cherry filling.
A Dollop of Whipped Cream
- Add a generous dollop of whipped cream on each slice.
- This adds extra creaminess, making every bite even more indulgent.
Chocolate Shavings
- Sprinkle chocolate shavings over the top before serving.
- This gives an elegant touch and intensifies the chocolate flavor.
Ice Cream Pairing
- Pair each slice with a scoop of vanilla or chocolate ice cream.
- The cold ice cream complements the cake’s texture perfectly.
Mint Leaves Garnish
- Add fresh mint leaves for a refreshing contrast.
- The mint enhances the presentation and adds a hint of freshness.
Drizzle of Chocolate Sauce
- Drizzle warm chocolate sauce over each slice just before serving.
- This creates a rich, decadent touch that chocolate lovers will adore.
How to Perfect No Bake Black Forest Icebox Cake
To ensure your No Bake Black Forest Icebox Cake is perfect every time, consider these tips.
-
Use chilled ingredients: Ensure your heavy cream is cold for better whipping. Cold ingredients whip up fluffier and hold their shape longer.
-
Layer wisely: Alternate layers of cookies, whipped cream, and cherry filling. This ensures even distribution and prevents soggy cookies.
-
Refrigerate overnight: For best results, refrigerate the cake overnight. This allows flavors to meld beautifully and the cake to set properly.
-
Stabilize whipped cream: Consider adding cornstarch or instant pudding mix to your whipped cream. This helps maintain its structure if storing leftovers.
-
Garnish before serving: Wait until just before serving to add any garnishes like chocolate shavings or mint leaves. This keeps them looking fresh and appealing.
Best Side Dishes for No Bake Black Forest Icebox Cake
Pairing side dishes with your No Bake Black Forest Icebox Cake can enhance the overall meal experience. Here are some delicious options to consider.
- Coffee: A cup of strong coffee balances the sweetness of the cake beautifully.
- Vanilla Ice Cream: Creamy vanilla ice cream pairs perfectly with the chocolate and cherry flavors.
- Fruit Salad: A light fruit salad adds freshness and counteracts the richness of the cake.
- Chocolate Mousse: Rich chocolate mousse complements the dessert while staying within theme.
- Cheese Platter: A selection of soft cheeses provides a savory contrast to sweet flavors.
- Nutty Granola Bars: Crunchy granola bars offer a great texture contrast alongside the creamy cake.
- Mint Lemonade: Refreshing mint lemonade cleanses the palate between bites, enhancing enjoyment.
- Pecan Pie Bites: Small pecan pie bites provide a nutty sweetness that pairs well with cherries.
Enjoy experimenting with these serving ideas and side dishes!
Common Mistakes to Avoid
When making the No Bake Black Forest Icebox Cake, it’s easy to run into some common pitfalls. Avoid these mistakes for the best results.
- Using stale cookies: Ensure your chocolate wafer cookies or graham crackers are fresh. Stale cookies can ruin the texture of your cake.
- Not chilling long enough: This cake needs at least 6 hours in the fridge to set properly. Don’t rush the chilling process; overnight is best.
- Overwhipping the cream: Beat the heavy whipped cream just until stiff peaks form. Overwhipped cream can become grainy and hard to spread.
- Skipping layers: Make sure to create three distinct layers of cookies, whipped cream, and cherry filling. Skipping layers will affect both flavor and presentation.
- Ignoring garnishes: A simple garnish of extra whipped cream or chocolate shavings can elevate your dessert’s appearance. Don’t skip this step!
Refrigerator Storage
- Store your No Bake Black Forest Icebox Cake in an airtight container.
- It can last in the fridge for up to 3 days without losing its flavor or texture.
Freezing No Bake Black Forest Icebox Cake
- You can freeze this cake for up to 2 months.
- Wrap it tightly in plastic wrap and place it in a freezer-safe container.
Reheating No Bake Black Forest Icebox Cake
- Oven: Preheat your oven to 350°F (175°C) and place individual slices on a baking sheet for about 5-10 minutes until slightly warm.
- Microwave: Heat a slice on medium power for 15-20 seconds. Be careful not to overheat, as it can melt the whipped cream.
- Stovetop: Use a skillet on low heat with a lid covered for about 5 minutes, checking frequently.
Frequently Asked Questions
Can I make No Bake Black Forest Icebox Cake ahead of time?
Yes, this cake is perfect for making ahead! Prepare it a day before serving for optimal flavor.
What variations can I try with No Bake Black Forest Icebox Cake?
You can experiment with different fruit fillings like strawberries or blueberries. Additionally, consider using different flavored whipped toppings.
How do I stabilize whipped cream for longer storage?
To stabilize whipped cream, add a bit of cornstarch or instant pudding mix while whipping. This helps maintain texture even after refrigeration.
Can I use light whipped topping instead of heavy cream?
Yes, frozen whipped topping is a great substitute! Just ensure it’s thawed before using it in your recipe.
What are some serving suggestions for No Bake Black Forest Icebox Cake?
Serve with fresh cherries on top or drizzle with chocolate syrup for extra indulgence!
Final Thoughts
The No Bake Black Forest Icebox Cake is an incredibly easy dessert that brings joy during hot summer days. With just four ingredients, you can whip up something delicious and visually appealing. Plus, its versatility allows you to customize it with various flavors and toppings. Give this no bake dessert a try; it’s sure to impress family and friends!
No Bake Black Forest Icebox Cake
No Bake Black Forest Icebox Cake is the ultimate summer dessert, offering a delightful blend of rich chocolate and sweet cherry flavors. This simple, no-bake treat requires just four ingredients and minimal prep time, making it perfect for any occasion—from picnics to birthday celebrations. The creamy whipped topping combined with layers of chocolate wafer cookies and cherry pie filling creates an indulgent yet refreshing experience that everyone will love. Best of all, it’s served chilled, making it an ideal dessert for warm days. Impress your family and friends with this easy recipe that’s as beautiful as it is delicious!
- Prep Time: 15 minutes
- Cook Time: None
- Total Time: 0 hours
- Yield: Serves approximately 8 slices 1x
- Category: Dessert
- Method: No Bake
- Cuisine: American
Ingredients
- 2 packages chocolate wafer cookies (about 300g)
- 1 can cherry pie filling (540ml or 2 cups)
- 2 cups heavy whipped cream
- 1/2 cup powdered icing sugar
Instructions
- In a mixing bowl, whip the heavy cream and powdered sugar together until stiff peaks form.
- Layer one-third of the chocolate wafers in a springform pan, followed by one-third of the whipped cream mixture and one-third of the cherry pie filling.
- Repeat the layering process two more times, ending with cherries on top.
- Cover and refrigerate for at least six hours or overnight before serving.
Nutrition
- Serving Size: 1 serving
- Calories: 320
- Sugar: 22g
- Sodium: 55mg
- Fat: 22g
- Saturated Fat: 13g
- Unsaturated Fat: 7g
- Trans Fat: 0g
- Carbohydrates: 30g
- Fiber: 1g
- Protein: 3g
- Cholesterol: 70mg

Leave a Comment