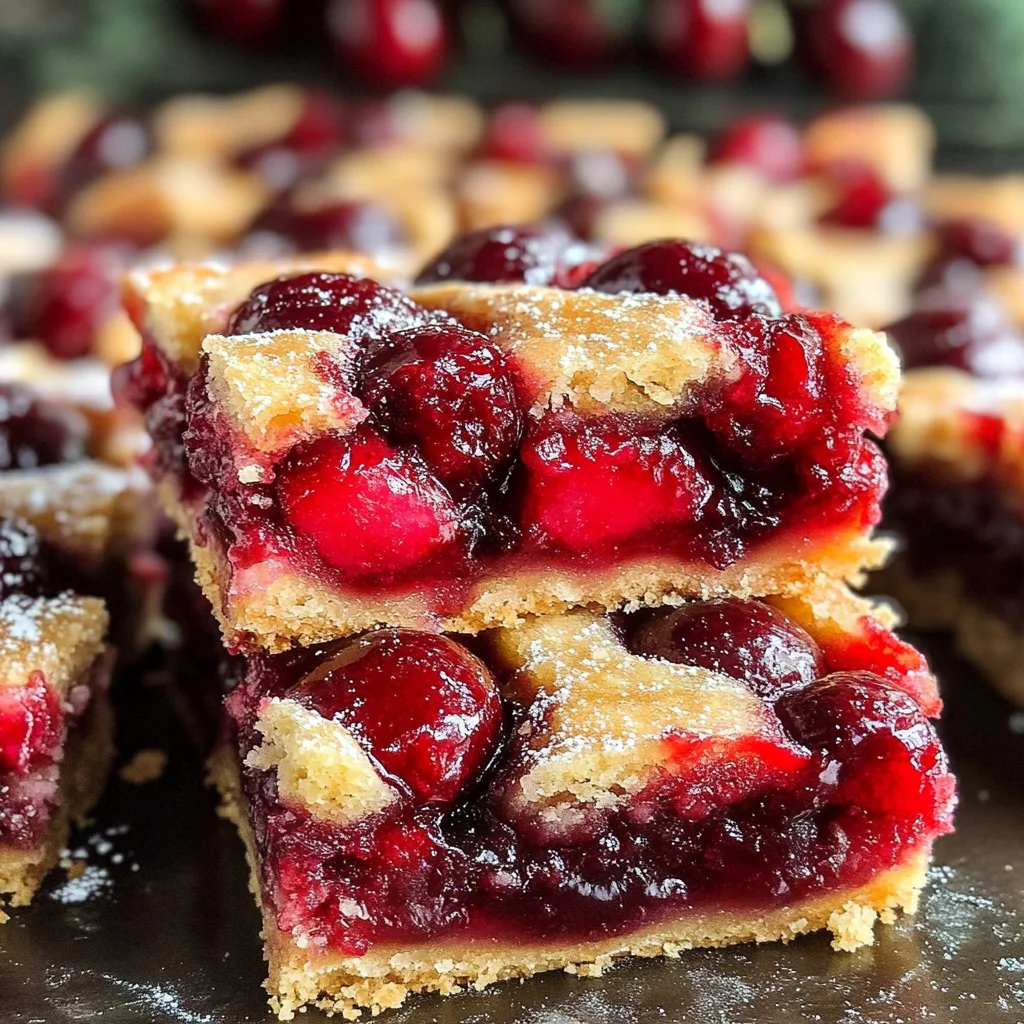
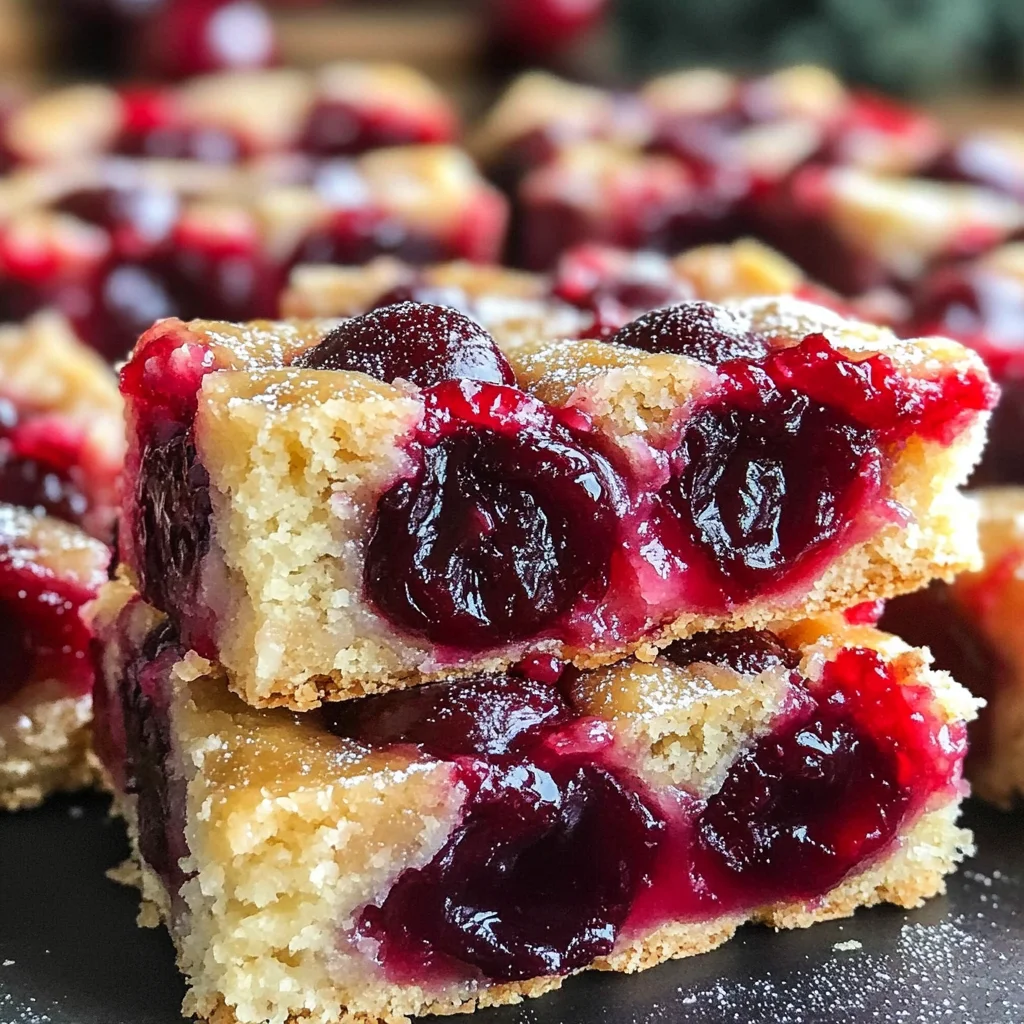
special occasion Cherry Bars are a delightful dessert that truly embodies the spirit of the holiday season. With a rich, buttery base topped with sweet and tangy cherry pie filling, these bars are both easy to make and a joy to share at various gatherings. Perfect for holiday festivities, special occasion Cherry Bars will quickly become a staple in your baking lineup.
Why You’ll Love This Recipe
- Simple to Prepare: With just a few straightforward steps, these bars can be whipped up in no time.
- Festive Flavor: The combination of buttery goodness and cherry sweetness makes these bars a holiday favorite.
- Versatile Treat: Great for parties, potlucks, or as a cozy dessert at home, they suit any occasion.
- Easily Scalable: Need more? Simply double the ingredients for larger gatherings.
- Perfect for Sharing: Cut them into squares and share with friends and family for an instant smile!
Tools and Preparation
Before diving into this delicious recipe, gather your tools. Having everything ready will make the process smoother.
Essential Tools and Equipment
- Mixing bowls
- Baking pan (9×13 inch)
- Electric mixer
- Whisk
- Wire rack
Importance of Each Tool
- Electric mixer: Makes creaming butter and sugar effortless, helping achieve the light, fluffy texture you want.
- Baking pan: The right size ensures even baking and allows for perfect portion sizes when cutting the bars.
Ingredients
To create these festive special occasion Cherry Bars, gather the following ingredients:
For the Base
- 1 cup butter (softened) (Provides the rich, buttery base for the bars.)
- 2 cups sugar (Adds sweetness and helps create a tender texture.)
- 4 eggs (Adds richness and structure to the batter.)
- 1 tsp vanilla extract (Enhances the flavor of the bars with a warm, aromatic note.)
- 3 cups all-purpose flour (The main dry ingredient that forms the structure of the bars.)
- 1 tsp salt (Balances the sweetness and enhances the overall flavor.)
For the Topping
- 1 can – 21 ounces cherry pie filling (Provides the sweet and tangy topping that makes these bars festive.)
How to Make special occasion Cherry Bars
Step 1: Preheat the Oven
Preheat your oven to 350°F (175°C). Lightly grease your 9×13 inch baking pan to ensure easy removal later.
Step 2: Make the Batter
In a large mixing bowl:
1. Cream together the softened butter and sugar until light and fluffy.
2. Beat in each egg one at a time until fully combined.
3. Add in the vanilla extract and mix well.
Step 3: Combine Dry Ingredients
In another bowl:
1. Mix together flour and salt.
2. Gradually add this mixture into your creamed batter until fully incorporated.
Step 4: Assemble the Layers
Spread 3 cups of batter evenly into the bottom of your prepared pan.
Gently spread cherry pie filling over this layer. Drop small clumps of remaining batter over the cherry filling to create a rustic look.
Step 5: Baking
Bake in your preheated oven for 35-40 minutes or until golden brown on top. A toothpick inserted into the center should come out clean.
Step 6: Cooling
Allow your bars to cool completely on a wire rack before adding any glaze.
Step 7: Adding the Glaze (Optional)
Whisk together powdered sugar, milk, and vanilla extract until smooth. Drizzle this glaze over cooled bars for an extra touch of sweetness.
Step 8: Finish and Serve
Once glazed, cut your dessert into squares. Serve them up and enjoy this festive treat!
How to Serve special occasion Cherry Bars
special occasion Cherry Bars are delightful and versatile. They can be served in various ways to enhance their festive appeal. Whether you’re hosting a holiday party or enjoying them with family, here are some creative serving suggestions.
Individual Portions
- Serve each bar on a decorative plate for an elegant touch. This allows guests to enjoy their own piece while admiring the beautiful presentation.
With Whipped Topping
- Add a dollop of whipped topping on each bar for extra creaminess. This simple addition elevates the dessert, making it even more indulgent.
Pair with Ice Cream
- Serve warm bars alongside a scoop of vanilla or cherry ice cream. The contrast of temperatures will delight your taste buds and create a comforting treat.
Garnish with Fresh Cherries
- Top each bar with fresh cherries or a sprinkle of powdered sugar. This not only enhances the look but also adds a burst of flavor that complements the cherry filling.
Create a Dessert Platter
- Arrange the bars on a festive platter with other holiday treats. Including cookies, fudge, or brownies can create an inviting dessert table for guests to enjoy.
How to Perfect special occasion Cherry Bars
Perfecting your special occasion Cherry Bars is all about attention to detail and technique. Here are some tips to ensure your bars turn out wonderfully every time.
- Use room temperature ingredients: Allow butter and eggs to reach room temperature for better mixing, resulting in a smoother batter.
- Don’t overmix: Mix just until combined to keep the bars tender and avoid toughness.
- Check for doneness: Use a toothpick in the center; if it comes out clean, your bars are done baking.
- Cool completely before cutting: Allowing the bars to cool fully ensures cleaner cuts and better texture when serving.
- Store properly: Keep any leftovers in an airtight container at room temperature for up to 3 days for optimal freshness.
Best Side Dishes for special occasion Cherry Bars
When serving special occasion Cherry Bars, consider pairing them with delightful side dishes that complement their flavors. Here are some great options:
- Vanilla Ice Cream: A classic pairing that adds creaminess and balances the sweet-tart cherries.
- Hot Chocolate: Rich hot chocolate can enhance the warmth of your dessert experience during cold holiday evenings.
- Fruit Salad: A refreshing fruit salad can provide a light contrast to the richness of the bars.
- Cheese Platter: A selection of cheeses adds sophistication and pairs well with sweet flavors.
- Spiced Nuts: Roasted spiced nuts offer crunch and a savory element that balances sweetness.
- Coffee or Tea: Serving warm beverages like coffee or tea creates a cozy atmosphere perfect for enjoying these bars.
- Glazed Carrots: Sweet glazed carrots can add an unexpected savory-sweet combination to your dessert spread.
- Cranberry Sauce: A tangy cranberry sauce offers bright acidity that pairs beautifully with the sweetness of cherry bars.
Common Mistakes to Avoid
Many people make simple errors when preparing special occasion Cherry Bars. Here are some common pitfalls and how to steer clear of them.
- Bold phrase: Skipping the Cooling Phase – Allowing the bars to cool completely is crucial for the best texture. Cutting them too soon can result in a messy presentation.
- Bold phrase: Overmixing the Batter – Mixing too much after adding flour can lead to tough bars. Mix just until combined for a tender texture.
- Bold phrase: Ignoring Oven Temperature – Every oven is different, and yours may run hotter or cooler. Use an oven thermometer to ensure accuracy for perfect baking.
- Bold phrase: Not Greasing the Pan – Failing to grease your baking pan can cause the bars to stick, making it hard to cut them neatly. Always use cooking spray or butter for easy removal.
- Bold phrase: Forgetting the Glaze – While optional, the glaze adds a delightful finishing touch. Don’t skip it if you want that extra sweetness!
Storage & Reheating Instructions
Refrigerator Storage
- Store in an airtight container for up to 5 days.
- Place parchment paper between layers if stacking to prevent sticking.
Freezing special occasion Cherry Bars
- Wrap tightly in plastic wrap, then place in a freezer-safe container.
- Can be frozen for up to 3 months without losing flavor or texture.
Reheating special occasion Cherry Bars
- Oven: Preheat the oven to 350°F (175°C). Place bars on a baking sheet and heat for about 10 minutes.
- Microwave: Heat individual bars on medium power for 15-20 seconds until warm.
- Stovetop: Place bars in a skillet over low heat, covering with a lid until warmed through.
Frequently Asked Questions
Here are some frequently asked questions about special occasion Cherry Bars that might help you out!
What are special occasion Cherry Bars?
special occasion Cherry Bars are a festive dessert featuring a buttery base topped with sweet cherry pie filling, making them perfect for holiday gatherings.
Can I customize my special occasion Cherry Bars?
Absolutely! You can add nuts, chocolate chips, or even swap out cherry filling for other fruit fillings like blueberry or apple.
How long do special occasion Cherry Bars last?
When stored properly in an airtight container, they last up to 5 days in the refrigerator and up to 3 months in the freezer.
Can I make these bars gluten-free?
Yes! Simply substitute all-purpose flour with a gluten-free blend that measures cup-for-cup.
Are there any alternatives for cherry pie filling?
Yes! You can use fresh cherries cooked down with sugar and cornstarch or other fruit preserves as an alternative topping.
Final Thoughts
special occasion Cherry Bars are not only delicious but also versatile enough to adapt based on your preferences. They make an excellent addition to any holiday dessert table. Try customizing with your favorite flavors or toppings for a unique twist on this classic treat!
special occasion Cherry Bars
Indulge in the delightful flavors of special occasion Cherry Bars, a festive dessert that perfectly captures the essence of the holiday season. With a rich, buttery base layered with sweet and tangy cherry pie filling, these bars are simple to make and a joy to share at gatherings. They are not only visually appealing but also incredibly versatile, making them an ideal choice for parties, potlucks, or cozy evenings at home. Prepare to impress your friends and family with this easy recipe that’s sure to become a cherished holiday staple.
- Prep Time: 15 minutes
- Cook Time: 35 minutes
- Total Time: 50 minutes
- Yield: Approximately 12 servings 1x
- Category: Dessert
- Method: Baking
- Cuisine: American
Ingredients
- 1 cup softened butter
- 2 cups sugar
- 4 eggs
- 1 tsp vanilla extract
- 3 cups all-purpose flour
- 1 tsp salt
- 1 can (21 ounces) cherry pie filling
Instructions
- Preheat your oven to 350°F (175°C). Grease a 9×13 inch baking pan.
- In a large mixing bowl, cream together the softened butter and sugar until light and fluffy. Beat in eggs one at a time, then add vanilla.
- In another bowl, combine flour and salt. Gradually incorporate this mixture into the creamed batter until well blended.
- Spread half of the batter in the prepared pan. Top with cherry pie filling, then dollop remaining batter over it to create a rustic look.
- Bake for 35-40 minutes until golden brown; check doneness with a toothpick.
- Cool completely on a wire rack before cutting into squares.
Nutrition
- Serving Size: 1 serving
- Calories: 250
- Sugar: 20g
- Sodium: 150mg
- Fat: 10g
- Saturated Fat: 6g
- Unsaturated Fat: 3g
- Trans Fat: 0g
- Carbohydrates: 39g
- Fiber: 1g
- Protein: 3g
- Cholesterol: 70mg
Leave a Comment